


Orchids are such an wonderful plant that anyone would fall in love with. They are very delightful to grow. In some genus like Phalaenopsis, the flowers will stay for months. If you have been an orchid person for some time, you know that Orchids are expensive. If you are wondering why these plants are so darn expensive, it is due to the difficulty in propagating orchids and the years it takes to produce a mature plant. I am going to explain to you the methods to grow your own baby orchids in both backyard and at a commercial scale.
Hopefully, this will help you answer why your phalaenopsis never produce seeds nor any baby plants. With a few techniques and a lot of patience you can also create your own baby plants so you can do Orchid swaps with your friends as well.
How orchids propagate in wild:
Let us first discuss about how orchids grow and reproduce in the wild. Orchids propagate in the same way like any other plant – flowers, pollen, pollination, seeds, dispersion and growth under favorable conditions.
Seed creation:
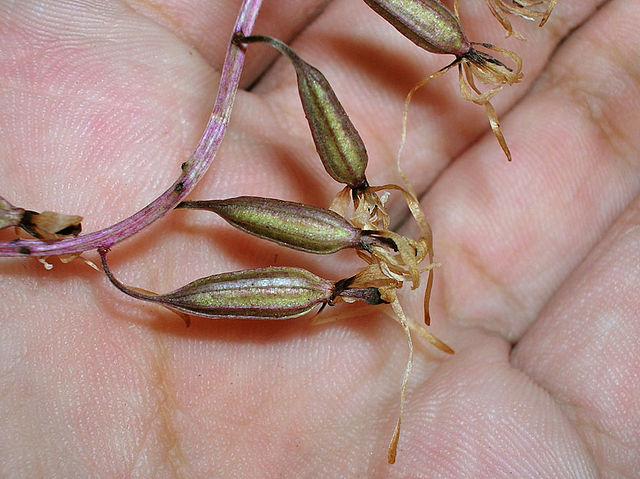
Once the plants bloom, the flower is pollinated. The pollinated flower sets seeds. The seeds are tiny and lightweight. They are protected inside a seed pod or capsule. After a period of maturation from inside the pod, the seed pod dries out and rupture. The seeds are carried away by wind.
Dispersion:
As I stated earlier, the tiny lightweight seeds makes it easy for the seeds to be blown away in the wind till they find an ideal medium to grow. This helps to ensure that the plants not being overcrowded in a limited space. This wind dispersion helps keep the plants alive thereby reducing the competition for nutrients and resources the plants need to thrive.
Growth to new plants
The key to seeds growing into plants is the ‘favorable conditions’.What are these favorable conditions? In other words the wild orchid seeds need special mycorrhizal fungi for germination to take place. This is a step which we cannot imitate in our indoor setup. The fungi also provides the essential nutrition for the development of the new plant. That’s the reason the orchid seeds wont germinate in our potting soil, like any other plant.
If you have finished reading the orchid propagation in wild and are discouraged that you will be never able to grow baby orchids at home, I have good news for you. There are a few things we can do to grow our own orchids.
Orchid Growth Type
Before we discuss on how to grow our own baby orchids, need to know a few categorization of orchid biology, which will help you determine the orchid propagation method.
First we need to determine what type of growth your orchid exhibits. Depending on the type of growth habit you will have a different mechanism to propagate.
- Monopodial: It grows in a single stem throughout its lifetime sending out alternate leaves on both sides of the plant. A common example of this type of orchid is phalaenopsis.
- Sympodial: they spread by rhizomes or pseudobulbs. New plants emerge from old pseudo bulbs giving rise to new plants. Cattaleyas, oncidium fall under this category.
Methods of creating baby orchids:
- Vegetative propagation
- Root Division
- Backbulbs
- Offshoots
- Tissue Culture
- Through seeds
Orchids can reproduce by two methods the one by seed production(but don’t get too excited yet), and the other by vegetative propagation.
Let us cover the easiest of them (now that we know that seed production and mimicking the nature’s way of growing and caring for orchids is difficult). Growing orchids through vegetative propagation is easy compared to seed production. By this method you may be able to grow baby orchid plants with exact characteristic of the parent plant.
Root Division – Method 1:
When sympodial plants mature they will produce new plants by creation of new bulbs. Each old bulb is capable of sending one or two new bulbs. Each of this bulb will grow into a new plant. The baby plant will mature to be the new adult plant. This cycle will continue until the flowering pot is filled up with new bulbs. Once the plant has no space to grow new bulbs inside the pot, the plants start to spill outwards of the pot. This is when you divide the plants into two or three depending on the number of bulbs. While dividing make sure each plant has at least three mature bulbs, so the plants can grow healthily into new plants.
How to make the division:
Always have an idea about the number of bulbs in your plant and how many divisions you want to make. Having a knife at hand will help to cut the roots a little to make the division. Once you have divided the plant, pot the new divided orchid plants into new planting medium. The plants may skip a season or two of flowering, because of the stress and adaptation to new environment. So patience is the key. But when done properly each of them will grow out to be a new plant group and they will start to produce their new bulbs.
Backbulb propagation – Method 2:
Back bulbs are found in orchids with pseudobulbs but not in phalaenopsis or vanda. They are the older bulbs which looks a bit shriveled but healthy. The active/viable back bulbs are dormant, when separated from the pot carefully cutting through the roots, they may develop into new plants. But this method is tricky which needs some knowledge and patience. One wrong cut on the backbulb the game is over! You may end up losing the whole plant. I won’t recommend this to any novice growers.
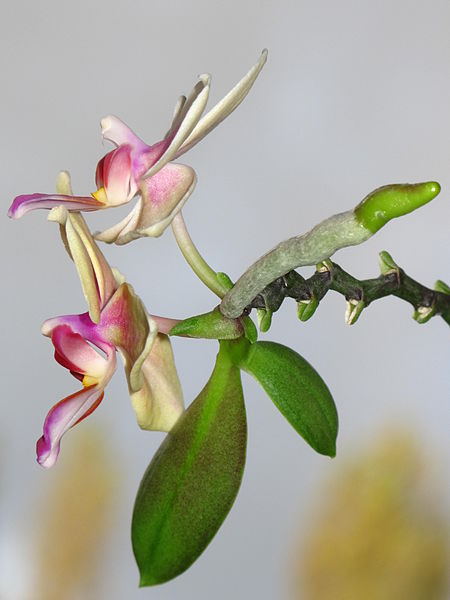
Offshoots/Keiki – Method 3:
Keiki are new plants which are formed on the stem of the plant. Dendrobium orchids are very popular for sending up keikis every now and then. Sometimes the spent flowerheads of phalaenopsis also sends keiki. Initially the keikis are formed without roots, later they will develop root system.
Here is a great article on how to take a baby orchid in keiki stage all the way to a full young plant.
Vegetative propagation in common orchids
Let me take you through some of the common orchid varieties and how they can be propagated through vegetative propagation of orchids. All Orchids are capable of producing seed pods when properly pollinated.
Phalaenopsis:
These are the more common orchids found in stores. Phalaenopsis adopt well to the temperate weather with less sunny or cloudy days in winter. It is difficult to propagate these orchids. In Phalaenopsis orchids, once the blooms are spent cut down the stalk leaving three or four nodes from the base of the plant, you may get another flower stalk or a keiki.
What to do when phalaenopsis turns leggy:
Phalaenopsis plants grow on single stem. As they mature and get older they start to lose the leaves at he bottom of the plant. You may end up with a leggy plant. To address this situation, cut the base of the plant leaving three or four leaves from the base, leave the older plant in the same pot. Plant the cut portion in a new potting medium. If everything goes well, each section (top and bottom) may grow into a new plant. Pretty cool.
Dendrobium:
Dendrobium does well in warmer weather. They are are fun to grow as well. The flower stalks are formed from the stems. Once the dendrobium stalk has bloomed it sends out young plants along the stem called keiki. It will develop roots and thrive well into new adult plant. Once the roots are well developed, the keiki can be separated from the parent and grown into a new plant.
Dendrobium propagation through cuttings:
Prepare a tray (lets call it a rooting tray) with a layer of sphagnum moss. Soak the moss in water, drain the dripping water from the medium. The moss should be most but not soggy. Spread an even layer of the moss medium in the rooting tray. Select a stem which has bloomed but still green and healthy. Place the stem cuttings with each cutting having atleast a single node on top of the medium and mist with water. Cover the tray with plastic wrap to keep the humidity high. If needed poke some holes on the plastic wrap. Place the tray in a warm place away from direct sunlight. This may trigger the stem cutting to produce new baby orchids.
Cymbidium:
These are some of the unruly orchids and difficult to tame in a small space. They take up a large space but also rewards with lots of blooms in long spikes. Cymbidium have root bulbs, which helps them to store food and water. Cymbidium orchids can be propagated by bulb division method. When the plant has produced enough bulbs you can separate to new plants, but each separated plant should have a minimum of three mature bulbs.
Cymbidium produce round pseudo bulbs at the base of the plant, upon maturity each bulb will bloom, then lose its leaves over the years and becomes leafless. This bulb is called backbulb. The back bulb will remain alive for few more years providing nourishment for the younger bulbs. After few years the backbulbs will shrivel turn brown then it is detached from the plant. The backbulbs can also be used for propagation. See the backbulb propagation method for more details.
Vanda:
These are the most interesting orchids to grow. These plants can grow without any potting material in baskets, but they need ample amount of water and daily spraying when grown without any potting material. The flowers are most beautiful and stays on the plant for months. These plants are also difficult to propagate taking long time to germinate, the seed pods are collected by pollinating then grown under special conditions.
Oncidium:
These orchids have bulbs and are interesting to watch the plants grow. These orchids can be propagated by root division. But each division should have atleast three healthy bulbs. These plants can also be propagated by backbulb method.
Tissue Culture – Method 4
Another method of propagation is micropropagation or tissue culture. You will get exact replica of mother plant. This method is applied to lot of fruit trees and other plants as well to obtain the desired traits of parent. This method is done in laboratory in sterile condition.
Propagate orchid through seeds:
If you are thinking of the vegetative reproduction methods are complicated, wait until we discuss the methods of growing orchids through seeds.
Pollination for seed creation:
Before flasking you need seed pods and just like every other plant, seed pods are produced through pollination. When the plants are indoors you have to help with pollination of flowers using a cotton swab or tooth pick. After pollination the seeds can take from 3 to 12 months to mature. Once the seed pods bursts open you will lose the seeds, so monitor your plants everyday to collect the seeds.
Grow Medium (Introducing the Flask):
We discussed on how orchids need ‘favorable conditions’ to grow from seed. Since we cannot recreate the tropical weather or the fungal soil medium through our store bought orchid potting mix, modern day orchids are grown in ‘grow flasks’ under laboratory conditions. This process is called ‘flasking’. The seeds are carefully collected then taken to a laboratory and grown with proper care under sterile conditions. I found this article really helpful, since I have never done flasking myself, I like to leave all the hard inputs to the experts. However you can try this method if you have the time, space, resources and lots of patience. Here is a good link on how to do the full flasking process of growing orchids from seeds.
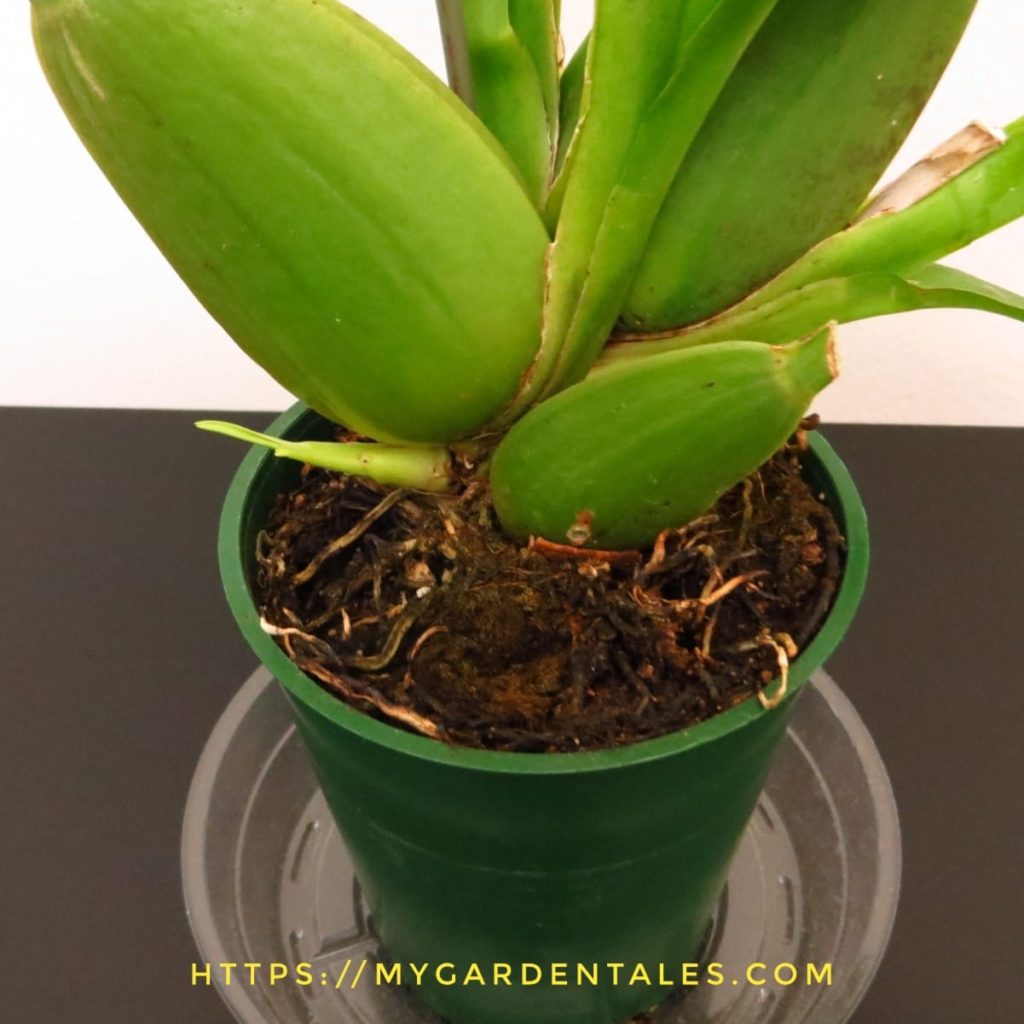
Deflasking:
Deflasking is easy when compared to flasking. Since you have done flaking for germination you have to deflask to remove the germinated seeds after a month or two. All you have to do is break the flask(glass) without damaging the tiny plantlets, then clean out all debris and grow medium before being potted in a regular medium. You can plant multiple plants in a single pot/tray cause they are small therefore have to be treated gently. Upon development you can transfer to new separate pots. Go through this link for more details on how to deflask orchids.
Caution about propagating orchids through seeds
I wont recommend this to any one who is a novice and are less patient. Another important factor is that this method is time consuming and you need specific sterile setup. Again patience is the main key here. Once you have deflasked depending on the genera it will take about 5 years to 7 years to bloom. Did I say patience is important? PATIENCE people:)
You can buy ready to open flasked orchids online or in orchid stores or from orchid shows as well. So if you want to try it and have fun you can start from there. It will make life a bit easy.
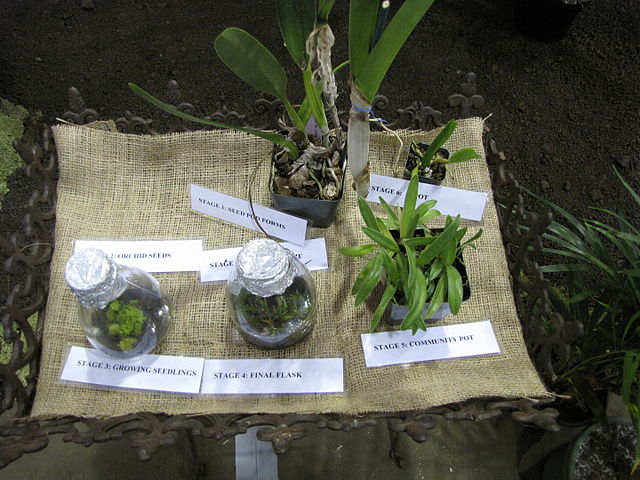
Here is a single image which explains the different stages of the orchid propagation process using the flasking method.
In Conclusion
Now you know all the procedures, setup, labor needed to grow your own baby orchids. If you still want to have fun and feel the experience definitely go for it, but you now know where you are diving into.
Often, I come across listings for orchid seeds sold in online platforms. I would say this, buy the seeds only if you are willing to go through the flasking procedure or someone is willing to do it for you. Therefore, be cautious before making your online orchid seed purchase.
So, if you ask me what is the bottom line, this is how I will summarize it. If you are starting out with orchids go with buying adult plants which are easy to take care and generally forgiving for any novice mistakes (most of the time). Here is a link to a post on how to select healthy orchids from store.
While you are at it, please do check my orchid gallery for cool orchid pictures.


Good on descriptions, thanks a lot
Thanks for the kind words.